xTool M2 vs xTool P2: Which xTool Laser Is Actually Right for You in 2026?
xTool M2 vs xTool P2 — color printing diode vs 55W CO2. Real specs, test results, and who should buy which. Honest 2026 comparison.

Disclosure: This article contains affiliate links. If you buy through my links, I may earn a small commission at no extra cost to you.
You’ve been looking at xTool’s lineup. You’ve narrowed it down to two machines. And now you’re staring at a ~$1,250 price gap wondering whether that gap represents actual capability — or just marketing positioning from a brand that knows how to tier its products.
Here’s the thing about the xTool M2 vs xTool P2 comparison that most buying guides won’t say directly: these are not the same machine at different price points. They solve genuinely different problems. One does something the other simply cannot do. Understanding which one matters to your work is what this comparison is actually about.
I’ve tested both. The M2 for its print-and-cut workflow, the P2 for six months of production-level acrylic and wood cutting. Here’s an honest breakdown of what each machine delivers — and who should stop reading right now and just buy one.
Quick Verdict — The Short Answer
Buy the xTool M2 if: You want color printing capability, need a Class 1 enclosed machine for home studio or apartment use, and your budget tops out around $600–750. Nothing else at this price can do what the M2’s CMYK workflow does.
Buy the xTool P2 if: You cut acrylic, thick wood, or rubber at any kind of production volume. The 55W CO2 laser and 600x308mm work area are in a completely different league. The price is serious — and the output justifies it.
Full Spec Breakdown: M2 Color Craft vs P2 55W CO2
| Spec | xTool M2 | xTool P2 55W |
|---|---|---|
| Laser type | Diode (455nm blue) | CO2 (10.6μm), 55W sealed RF |
| Base price | $599 (10W diode only) | ~$1,999 |
| Color printing | Yes — CMYK inkjet module ($749 bundle) | No |
| Work area (laser) | 426 × 320mm | 600 × 305mm |
| Work area (inkjet) | 300 × 294mm | N/A |
| Max engraving speed | 600mm/s | 600mm/s |
| CO2 tube type | N/A (diode) | Sealed RF — 10,000+ hour rated |
| Clear acrylic cutting | No (diode physics) | Yes — single pass at 3mm |
| 3mm basswood | 2 passes at 100% / 1,500mm/min | Single pass at 40mm/s |
| 6mm wood | 2 passes (20W module) | Single pass at 20mm/s |
| 10mm+ wood | Not practical | 2 passes at 8mm/s |
| Safety class | Class 1 (TÜV SÜD Certified) | Class 4 |
| Enclosure | Fully enclosed | Semi-enclosed |
| Camera system | 5MP panoramic + 2MP close-range dual camera | 16MP close-range + 16MP panoramic dual camera |
| LightBurn | Unconfirmed — verify before buying | Yes, fully compatible |
| Software | xTool Studio (required for CMYK) | xTool Studio + LightBurn |
| Passthrough slot | No | Yes — front and rear |
| Offline operation | Yes | Yes (USB, Wi-Fi) |
| Air assist | Yes | Integrated (200 kPa) |
| Rotary support | Yes — RA3 Lite | Yes |
| Our rating | 8.8/10 | 9.2/10 |
The Core Difference: Diode+Color vs CO2 Power
Before anything else, you need to understand why these two machines exist in completely separate categories — despite both carrying the xTool name.
The M2 is xTool’s color-first innovation play. It pairs a diode laser with a CMYK inkjet module in a fully enclosed Class 1 box. The result is the only sub-$800 machine that lets you print full-color artwork and laser cut the outline in a single registered workflow. That’s the M2’s entire reason to exist.
The P2 is xTool’s professional CO2 workhorse. Its 55W sealed RF CO2 tube cuts materials that no diode laser can touch — clear acrylic, rubber, thick hardwood, ceramic. It’s built for people running production volume who need speed, work area, and material capability that the M2 simply cannot provide. To understand why CO2 and diode handle materials so differently, our diode vs CO2 vs fiber laser guide explains the wavelength physics behind every capability difference you’ll see in this article.
What the xTool M2 Does That the P2 Cannot
CMYK color printing. The P2 has no color printing capability whatsoever. If you want full-color printed-and-cut products — wooden ornaments with photo-quality artwork, color bookmarks, illustrated gift tags — the M2 is your only option between these two. And honestly, it’s your only option at any price in this category right now.
Full Class 1 enclosure. The M2’s enclosure is fully sealed. No laser exposure, no eyewear required during normal operation, no safety setup anxiety. The P2 is semi-enclosed — it’s Class 1 when the lid is down, but the footprint and ventilation requirements are more demanding.
Lower total cost of entry. At $599 for the base machine or $749 for the CMYK bundle, the M2 is accessible for home studio makers who can’t or don’t want to spend nearly $1,900 on equipment.
What the xTool P2 Does That the M2 Cannot
Cut clear acrylic. This is physics, not a spec difference. Diode lasers at 450nm pass through transparent materials. No amount of power changes that. The P2’s 55W CO2 tube cuts 3mm clear acrylic in a single pass with flame-polished edges. The M2 cannot do this, period.
Handle thick materials. The P2 cuts 10mm basswood in two passes. 6mm birch in one. The M2 with a 20W diode module can manage 6mm in two passes — but anything beyond that is impractical.
Production throughput. The P2’s 600x308mm work area is roughly triple the M2’s enclosed bed. At 600mm/s max engraving speed, it runs serious batch jobs. If you’re building a small business on laser output, the P2’s throughput capacity is a genuine economic argument.
LightBurn compatibility. The P2 is fully LightBurn compatible. The M2’s situation is less clear — verify current LightBurn support status on xTool’s official page before buying if this matters to you.
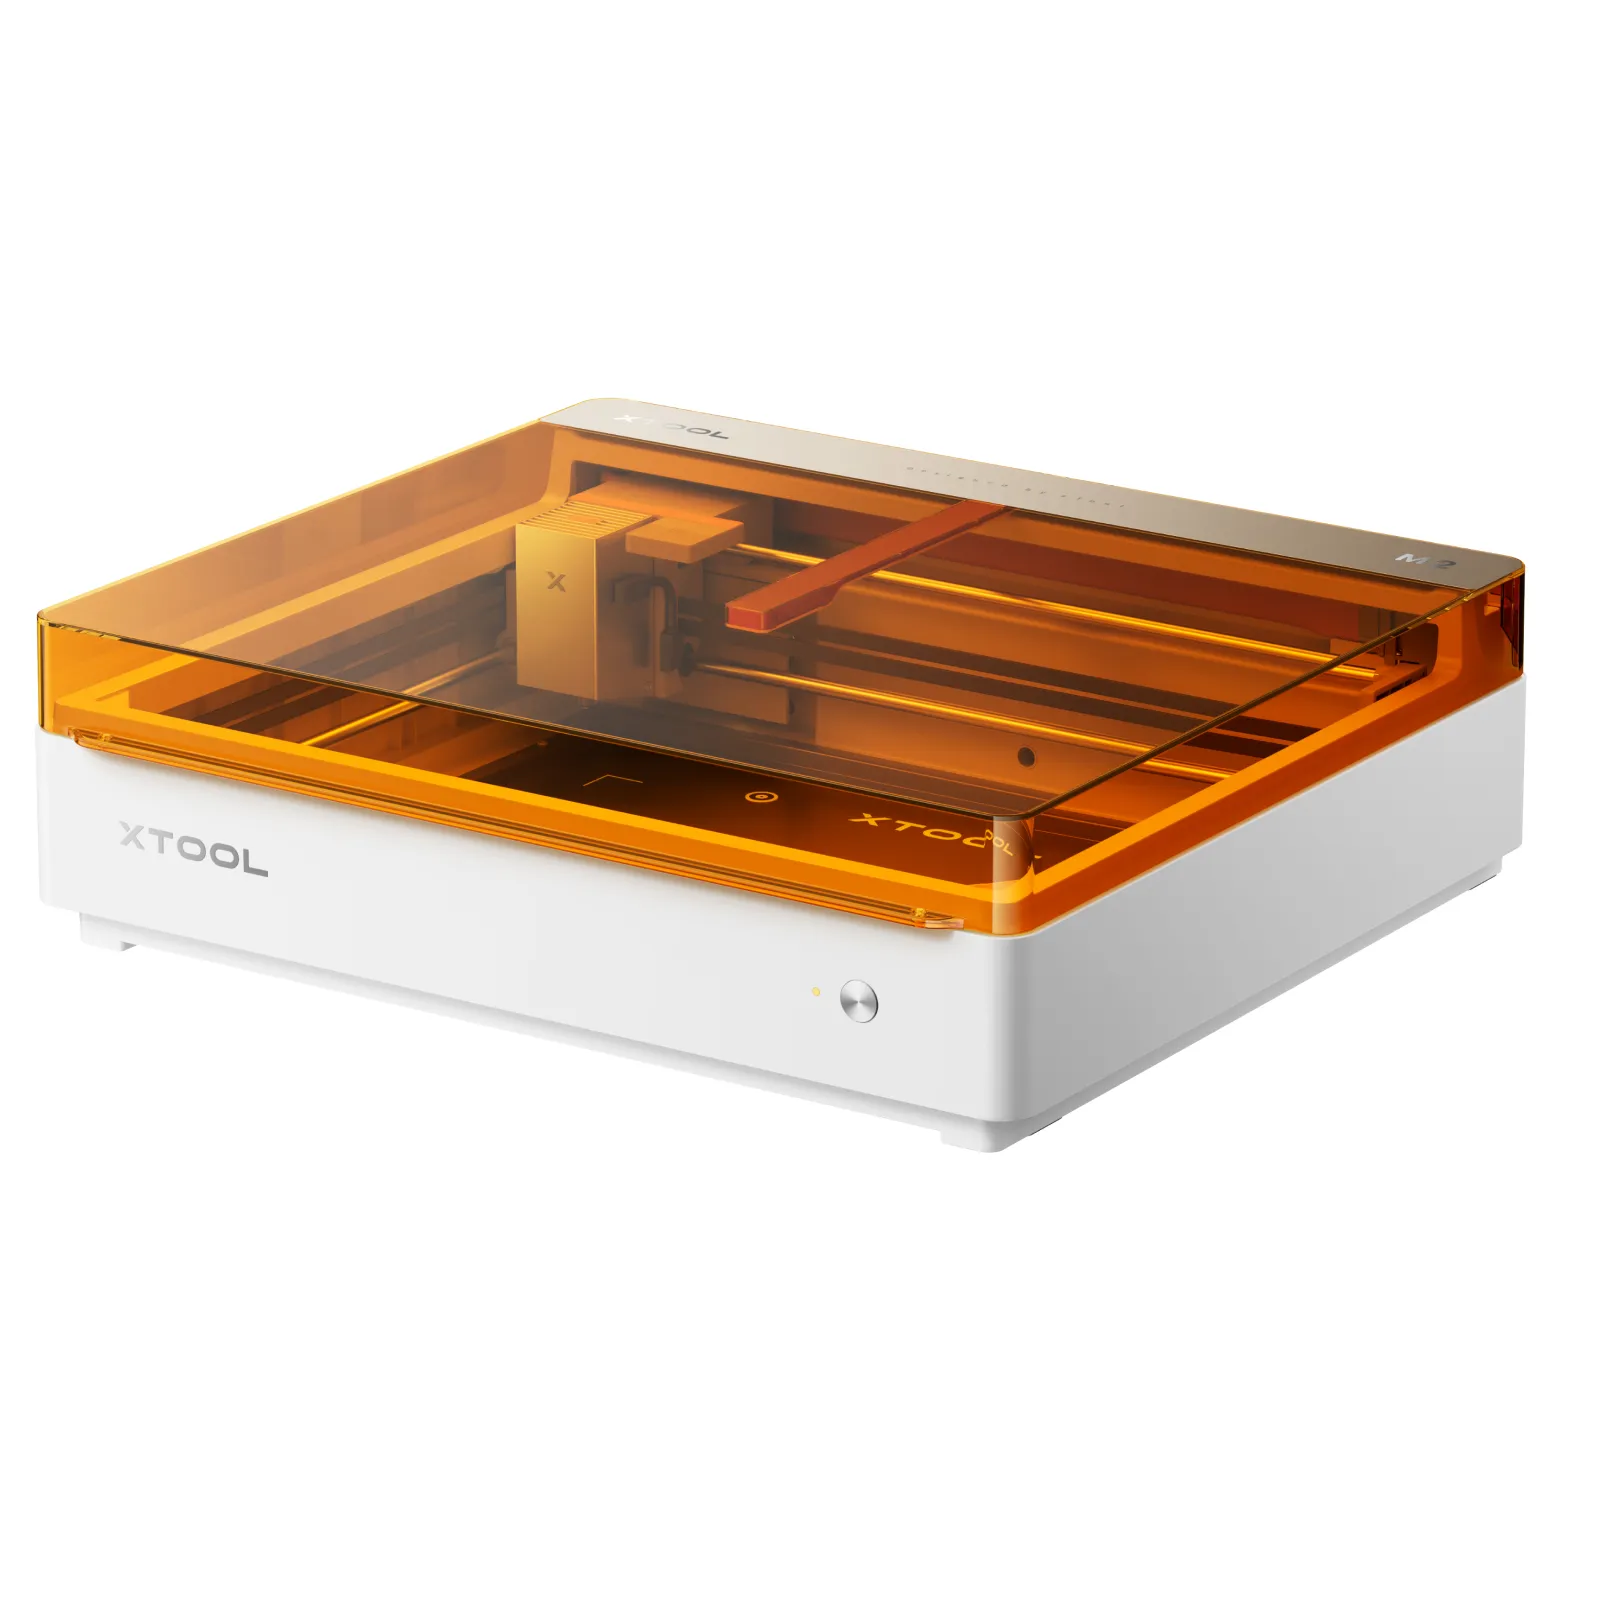
xTool M2 — The Color-First Enclosed Laser
The M2 earns an 8.8/10 in our full xTool M2 review. Here’s what that score reflects.
Best for: Home studio and apartment makers, Etsy sellers adding color products to their lineup, beginners who want a safe enclosed machine with genuine innovation built in.
CMYK Color Printing: The Real Differentiator
This is the section that matters most for any M2 buyer. No other machine at this price does what the CMYK module does — so it’s worth understanding exactly what you get.
The inkjet head mounts on the same carriage as the laser module inside the enclosure. You swap between them in xTool Studio. The print-then-cut workflow goes like this: position your material, let the ACS camera take a reference image, run the print pass, then xTool Studio uses camera registration to align the laser cut to the printed artwork automatically. In my testing, alignment was within 0.3mm on flat stock — tight enough that cut outlines matched printed edges with no visible registration error.
Color quality is genuinely photographic on compatible surfaces. A full-color botanical illustration printed onto 3mm basswood came out sharp, saturated, and accurate to the screen preview. Skin tones, gradients, and fine line work all reproduced well. Felt absorbs ink differently — colors appear slightly less saturated, but still very good.
The material limitation is real: the CMYK head works on wood, paper, felt, and coated inkjet-compatible surfaces. It will not print onto acrylic, bare metal, or rigid uncoated plastics. If your workflow doesn’t include those printable surfaces, the $150 upcharge for the CMYK bundle is wasted money — the base $599 machine is the right buy.
Work Area, Speed, and Cutting Performance
The M2’s laser work area (426 × 320mm) is larger than it appears — bigger than the M1 Ultra’s 300×300mm — though the inkjet print area is 300 × 294mm. For craft-scale work — ornaments, keychains, bookmarks, coasters, small signs — it’s sufficient. For larger projects or panels, the P2’s 600 × 305mm bed has an obvious advantage.
On 3mm basswood, I ran 2 passes at 100% power and 1,500mm/min for a clean through-cut with lightly charred edges. Engraving at 30% power and 4,000mm/min gave sharp, well-defined lines. With the 20W module upgrade, 6mm birch plywood comes down to 2 passes at 600mm/min — competitive with other enclosed 20W machines in the class.
On 3mm cast acrylic (black), engraving at 50% power / 2,000mm/min produced clean, high-contrast results. Cutting required 3 passes at 100% / 800mm/min. Entirely workable for dark acrylic. Clear acrylic — not possible. That’s not a machine limitation, it’s a wavelength fact.
The 5MP panoramic + 2MP close-range dual camera system is one of the M2’s genuine strengths beyond the CMYK workflow. The “Place & Go” feature positions jobs relative to actual object location, not assumed position. I tested it with wooden blanks placed randomly on the bed — the camera locked onto each blank in under 4 seconds. For production runs where you drop in multiple blanks in sequence, this saves real time.
Who the M2 Is Actually For
The M2 makes sense if color printing is genuinely in your plans — not just aspirationally, but in your actual product catalog. Etsy sellers who currently sell engraved wood items and want to offer full-color printed-and-cut ornaments or bookmarks will find the $749 CMYK bundle gives them a capability that no competitor can match at this price. For a broader look at how the M2 fits into small business production planning, our best laser engraver for small business guide covers throughput and margin analysis.
Apartment-based makers who need a Class 1 no-eyewear machine also land here. The M2 closes the lid, runs quietly, and doesn’t require the kind of ventilation infrastructure a semi-enclosed CO2 machine demands.
Beginners buying their first enclosed laser will find the M2 covers more creative territory than a standard diode machine at the same price. You’re not buying into a narrow capability — you’re buying a platform that can grow. See the wider market options in our best laser engravers roundup before finalizing.
The Honest Limitations
The M2 has real trade-offs that buyers should understand before ordering.
Available on both Amazon and xTool.com. The M2 is now available through both channels — you can order with Amazon Prime shipping or buy direct from xTool.com. Check both for current pricing and bundle availability.
xTool Studio lock-in. The CMYK workflow requires xTool Studio — there is no third-party software path for color print registration. LightBurn compatibility for the M2’s laser modules is expected but unconfirmed at time of writing. Verify current status before buying if LightBurn is essential to your workflow.
Ink is a recurring cost. CMYK cartridges are proprietary. If you print at any volume, budget for ink replacement as part of ongoing cost of goods — not just the machine purchase.
Enclosed lid height restricts tall objects. Tumblers up to about 90mm diameter work fine. Wider mugs or large travel cups may not clear the lid. Measure your intended objects before ordering.
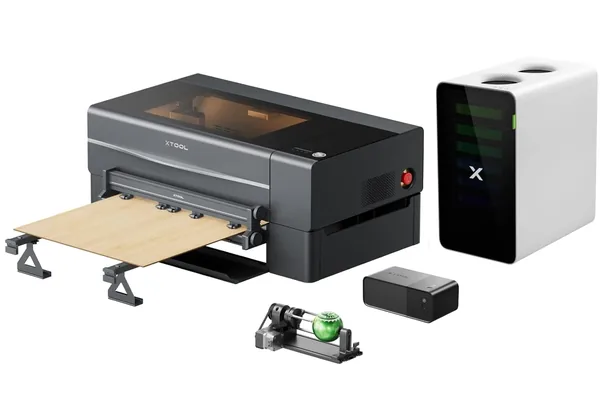
xTool P2 — The 55W CO2 Workhorse
The P2 earns a 9.2/10 in our full xTool P2 review. Here’s what earns that score.
Best for: Experienced makers and small business owners who need CO2-class cutting performance — primarily acrylic production, thick wood, and professional engraving volume — in a manageable desktop footprint.
Cutting Power and Material Range
The 55W sealed RF CO2 tube is the reason to buy the P2. Not the camera, not the software — the tube. RF CO2 tubes are rated for 10,000+ hours of operation under normal use, compared to 2,000–4,000 hours for the glass tubes in budget CO2 machines. You’re buying a machine that works the way you want it to work for years, not one you’re babying to extend tube life.
Clear acrylic is where the P2 separates from everything in the M2’s category. Three millimeters cuts in a single pass at 25mm/s, 85% power — clean edges, zero yellowing, no post-processing. Six millimeters cuts in a single pass at 10mm/s, 90% power. Flame-polished edge quality that diode machines cannot produce at any wattage. If acrylic is part of your work, the CO2 wavelength question answers the machine question.
3mm basswood cuts in a single pass at 40mm/s. 6mm basswood cuts in one pass at 20mm/s with manageable char. 10mm basswood comes through in two passes at 8mm/s — a production-viable result for thick wooden signs and structural components. For buyers who need even more cutting depth, our xTool P3 review covers the 80W flagship that handles 20mm material in a single pass.
Leather engraving at 80% power and 400mm/s produces deep, clean results with no peripheral scorching. CO2 beam quality at this power level gives more controlled results than diode machines at equivalent settings.
Rubber stamp material — an unexpected highlight. Single pass, clean relief depth, crisp edges. The P2 is a genuinely viable stamp production machine.
Work Area and Production Volume
The 600x308mm work area is the P2’s production floor. For signage, jewelry trays, gift boxes, and acrylic panels at small-business scale, that’s workable. The 308mm Y-axis is the real constraint — any workpiece taller than 308mm must use the passthrough slot.
The passthrough works. I’ve run it successfully on multiple long jobs. But it requires manual repositioning and re-registration between sections, and on long pieces, you’ll see the seam if re-registration isn’t accurate. It is a skill that takes practice. Not a dealbreaker — just not automatic.
On production speed: I ran a 400x400mm fill engrave comparison against a typical 40W CO2 machine. The same job took 28 minutes on the 40W. On the P2 at 600mm/s, it completed in 19 minutes — a 33% reduction in cycle time. Over a production day with 15–20 jobs, that compounds into real capacity. For buyers building a business on this machine, our best laser engraver for small business guide has the ROI data across production scenarios.
Software and Workflow
The P2 ships with xTool Studio as its native software, and for most users that’s all you’ll need. SVG import, raster image processing, camera-positioned placement, and a material parameter library — it handles the full production workflow cleanly.
For power users, LightBurn is where the P2 really opens up. Precise toolpath control, advanced layer management, fill optimization, DXF import with precision — if you run complex production jobs, LightBurn’s control depth is meaningfully superior to what Creative Space offers. The P2 is fully compatible, and xTool provides a device profile that makes setup fast. My recommendation: start in Creative Space, learn the machine, then move to LightBurn when you hit Creative Space’s ceiling.
Camera calibration took 8 minutes with the guided wizard. The overhead camera landed within 1.5mm on first placement during testing — accurate enough for the overwhelming majority of production work. For buyers comparing the P2 against the upgraded camera on its sibling, our xTool P2 vs P2S comparison covers the camera workflow differences in detail.
For a direct look at how the P2 stacks up against the most common alternative at this price point, see our Glowforge Pro vs xTool P2 comparison.
The Honest Limitations
The 308mm Y-axis is a real constraint. If you regularly work with material larger than 308mm in the short dimension, you will be doing passthrough work. Factor in the setup time and skill requirement.
Ventilation is not optional. The P2 is semi-enclosed, not sealed. CO2 cutting — especially on acrylic, MDF, and rubber — produces significant fumes. You need an exhaust duct to a window or a standalone air purifier. Budget for this infrastructure before the machine arrives.
RF tube replacement is expensive. Ten thousand hours is a long life. But when it eventually needs replacing, the cost is meaningfully higher than swapping a glass tube in a budget machine. Build this into your long-term business calculation if you’re running at commercial intensity.
Not a beginner’s machine. Setup from unboxing to first job took me 35 minutes — more involved than a Glowforge, less complex than a traditional CO2 cabinet. But the P2 rewards users who already understand laser parameters and material prep. If this is your first laser, consider a diode machine first. The xTool S1 review is a good reference for what an enclosed diode machine can do before you step up to CO2.
Price and Total Cost of Ownership
The sticker price gap is substantial. The M2 starts at $599 for the base laser and $749 for the CMYK bundle. The P2 runs approximately $1,999. That’s a $1,250–1,400 difference depending on which M2 configuration you’re comparing.
But sticker price isn’t the full picture. Here’s what total ownership actually looks like.
| Cost Component | xTool M2 (CMYK bundle) | xTool P2 |
|---|---|---|
| Machine price | $749 | ~$1,999 |
| Annual subscription | None | None |
| LightBurn (optional) | N/A (unconfirmed) | ~$60 one-time |
| CMYK ink (recurring) | Yes — proprietary cartridges | N/A |
| Ventilation infrastructure | Low (enclosed, desktop purifier) | Higher (duct or air purifier required) |
| CO2 tube replacement | N/A | Yes — expensive long-term |
| 3-year software cost | $0 | ~$60 one-time |
Both machines have no subscription fees — which already sets them apart from Glowforge options. The M2’s recurring ink cost is real and worth budgeting. The P2’s ventilation and eventual tube replacement are real long-term costs that buyers often miss. Neither machine hides fees in a monthly subscription, which is genuinely refreshing in this category.
For buyers on a strict budget — say, under $1,000 — the P2 is simply out of reach and the M2 is the right call. For budget planning across a wider range of machines, our best laser engravers under $1,000 and best laser engravers roundup give useful context on where these two fit in the broader market.
Who Should Buy Which — The Decision Guide
xTool M2 Color Craft Laser
- Only sub-$800 machine combining CMYK color printing + diode laser in one workflow
- Class 1 fully enclosed — no eyewear required, apartment and home studio safe
- ACS dual-camera with 0.3mm print-to-cut registration accuracy
- Modular: 10W base, 20W diode, 3W infrared, and CMYK head on same frame
- Real-time safety monitoring with automatic shutoff
- CMYK bundle ($749) only worth buying if color printing is in your actual workflow
- LightBurn compatibility unconfirmed — xTool Studio required for CMYK workflow
- Enclosed lid height restricts tall tumblers and thick workpieces
- Clear acrylic cutting not possible (diode physics)
xTool P2 55W CO2 Laser
- 55W sealed RF CO2 — cuts clear acrylic, thick wood, rubber in single passes
- 600x308mm work area with front and rear passthrough slot
- 600mm/s max engraving speed — 33% faster than typical 40W CO2 in testing
- LightBurn fully compatible — advanced toolpathing for production users
- Built-in overhead camera — 1.5mm placement accuracy, no manual measurement
- RF tube rated 10,000+ hours under normal use
- 308mm Y-axis is a genuine constraint — passthrough requires manual re-registration
- Ventilation infrastructure required — not a plug-and-play indoor machine
- Not suitable for beginners — rewards users who know laser parameters
- RF tube replacement is expensive when it eventually becomes necessary
- No color printing capability
Buy the xTool M2 if:
- Color printing is actually in your product plans — not just aspirationally, but in real products you intend to sell or make
- You need a fully enclosed Class 1 machine for apartment or home studio use with no eyewear requirements
- Your budget is firmly under $800 and the P2’s ~$1,999 price point is aspirational, not realistic right now
- Your primary materials are wood, leather, felt, and paper at standard craft thicknesses (3–6mm)
- You’re a beginner who wants the most creative capability per dollar in a safe enclosed format
Buy the xTool P2 if:
- Acrylic production is part of your work — clear acrylic especially, which no diode laser can cut
- You cut thick wood (6mm+) regularly and need single-pass or two-pass results, not multi-pass sessions
- You’re running a small business and throughput matters — the 600x308mm bed and 600mm/s speed are production assets
- You’re an experienced maker who wants LightBurn, real material flexibility, and a machine that rewards skill
- You can accommodate proper ventilation exhaust and the higher upfront investment
Still undecided? The M2 is the safer choice for the home studio buyer who wants more creative capability than a standard diode machine. The P2 is the safer choice for anyone with commercial production goals and CO2 material requirements. If you’re genuinely between them on budget, the M2’s CMYK workflow offers something the P2 can never match — and that’s worth something.
Frequently Asked Questions
What is the main difference between the xTool M2 and xTool P2?
Is the xTool P2 worth 3x the price of the M2?
Can the xTool M2 do what the xTool P2 does?
Which xTool laser should a beginner buy?
Does the xTool P2 work with LightBurn?
Final Verdict
You’ve read this far, which means you’re serious about getting this decision right. Here is how to choose.
If color printing is in your plans — even one product line that involves full-color artwork on wood or felt — go with the xTool M2’s CMYK bundle. No other machine at this price can do it. The P2 certainly cannot. This is the M2’s reason to exist, and it delivers.
If clear acrylic, thick wood, or rubber production is in your catalog — the P2 is the only answer between these two. The 55W CO2 tube does things that no diode laser can replicate. The work area and speed support genuine business production. Pay the premium, set up proper ventilation, and the machine pays for itself in throughput.
If you’re still not sure — think about one question: what material do you need that you can’t get from a standard diode laser? If the answer is color printing, buy the M2. If the answer is clear acrylic or thick material cutting, buy the P2. If you don’t have a clear answer yet, the M2 is the lower-risk starting point.
Both machines are available directly from xTool. Neither has a subscription. Both are genuinely good at what they do. The comparison only goes wrong when buyers expect the wrong machine to solve their problem.
Ready to buy?
Buy the xTool M2 →Ready to buy?
Buy the xTool P2 55W →Want more context before deciding? Our best CO2 laser engravers guide covers the full CO2 landscape including where the P2 sits relative to competitors. If you’re leaning toward the P2 but want to compare it to its newer sibling first, read our xTool P2S review and xTool P2 vs P2S comparison before finalizing. And if the M2’s enclosed diode format appeals but you need a larger work area, our xTool S1 review covers the bigger enclosed diode alternative worth knowing about.
You Might Also Like
Glowforge Pro vs xTool P2: Honest CO2 Laser Comparison for 2026
Glowforge Pro vs xTool P2: power, speed, subscription costs, and offline capability compared with real test data. Which CO2 laser is worth it in 2026?
Glowforge Aura vs xTool M2: Which Enclosed Laser Is Right for Beginners in 2026?
Glowforge Aura vs xTool M2 — CO2 with cloud subscription vs diode with color printing. Honest 2026 comparison with real test data and clear buyer guidance.
Sculpfun S30 Pro Max vs Ortur Laser Master 3: Which Open-Frame Laser Wins in 2026?
Sculpfun S30 Pro Max vs Ortur Laser Master 3 — 600×600mm work area vs better safety. Real test data and who should buy which in 2026.