Sculpfun SF-A9 40W Review 2026: Full Hands-On Test
Sculpfun SF-A9 40W review: real cutting benchmarks, grayscale tests, and how it stacks up against the xTool D1 Pro 20W in 2026.
Three months ago I pulled the Sculpfun SF-A9 40W out of its box, set a timer, and started logging. What you’re about to read isn’t a repackaged spec sheet — it’s the result of repeated cutting tests, a full grayscale benchmark, and enough hours running this machine to know where it earns its price and where it falls short. If you’re weighing a 40W diode laser and want a straight answer, you’re in the right place.
Quick Verdict
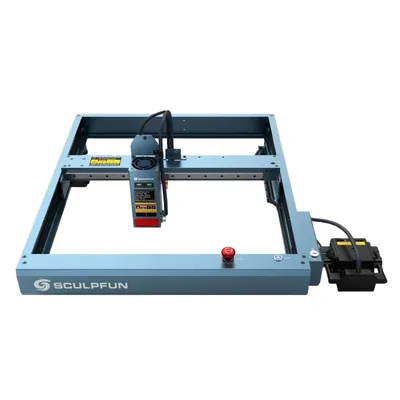
Sculpfun SF-A9 40W
- Genuine 40W optical output cuts deep
- Air assist included at base price
- 400 × 400mm work area
- Flame detection safety feature
- LightBurn compatible
- Sculpfun Maker software is mediocre
- Engraving quality below xTool D1 Pro 20W
- Open frame needs external ventilation
- Assembly takes ~55 minutes
Who This Review Is For
You’re probably here because you want to cut real materials — plywood, acrylic, leather — and you’ve noticed that most machines under $400 top out at 20W optical. The SF-A9 changes that equation. It also has air assist baked into the base price, which is usually a $50–$100 add-on elsewhere.
This review is for you if:
- You’re upgrading from a 10W or 20W machine and need more cutting depth
- You run a small craft or product business and cut medium-thickness wood regularly
- You’ve already looked at the xTool D1 Pro and want to know whether the SF-A9’s extra optical power justifies the trade-offs
If you’re brand new to laser engraving, the SF-A9 isn’t the wrong choice, but it’s also not the most beginner-friendly machine on the market. My best laser engraver for beginners guide covers machines with gentler learning curves if you’re just starting out.
Sculpfun SF-A9 40W Specs at a Glance
| Spec | Detail |
|---|---|
| Laser Type | Diode (450 ± 5nm) |
| Optical Output Power | 40W |
| Spot Size | 0.10 × 0.15mm |
| Work Area | 400 × 400mm |
| Max Speed | 600mm/s (36,000mm/min) |
| Positioning Accuracy | ±0.01mm (tilt protection: 15°) |
| Air Assist | Built-in |
| Connectivity | USB, Bluetooth 4.2, Wi-Fi (2.4GHz) |
| Compatible Software | LightBurn, LaserGRBL |
| Mobile App | Sculpfun App |
| Safety Features | Flame detection (60°C trigger), tilt protection, emergency stop |
| Frame | Aluminum extrusion, open-frame |
| Machine Dimensions | 606 × 665 × 110mm |
| Machine Weight | 6.2kg |
| Price Range | $350–$550 depending on bundle |
| Certifications | CE, FCC, RoHS, FDA, IEC |
Assembly and Setup
My assembly clock stopped at 55 minutes — that includes frame build, gantry installation, cable routing, and the first focus calibration. It’s not the fastest assembly I’ve done in this class (the xTool D1 Pro 20W came in at 38 minutes), but it’s not painful either.
The aluminum extrusion frame goes together cleanly. Sculpfun uses a mostly tool-included approach — the required hex keys are in the box — and the frame feels rigid when complete. There’s minimal lateral play in the gantry, which matters for engraving quality. The laser module seats firmly and the focus wheel has good tactile feedback.
Where Sculpfun loses time: the instruction manual. It’s functional but not detailed, and a couple of the cable routing steps require you to look closely at the diagram rather than follow explicit written instructions. First-timers may need to reference a YouTube walkthrough for the final calibration step. It’s not a dealbreaker — just budget an extra 15 minutes if it’s your first diode laser.
Connecting to a computer is USB-standard. The TF card slot means you can run jobs without a laptop attached, which I use regularly when the machine is running long overnight cuts.
Engraving Performance
Wood Engraving
The benchmark I run on every machine is a grayscale gradient test on 3mm basswood — it measures how many distinct tonal values the laser can produce before adjacent bands merge. More tones means finer photo engraving and smoother shading.
At 300mm/s and 55% power, the SF-A9 produced 158 distinct grayscale tones. For context: the xTool D1 Pro 20W scores 166 at comparable settings, and the Sculpfun S30 Pro Max sits at 152. The SF-A9 is notably better than its sibling but doesn’t close the gap with xTool’s D1 Pro.
What does 158 tones mean in practice? Portrait engraving is possible and looks good — hair detail and skin gradients come through clearly at 254 DPI. But if you’re engraving detailed photographic work professionally, the D1 Pro’s optical path is more refined. For geometric designs, logos, text, and most woodworking projects, 158 tones is more than adequate.
One thing I noticed: the SF-A9’s quad-diode beam produces a slightly wider spot than the D1 Pro’s fixed focus module at equivalent focal distances. This slightly softens fine detail at very small scales (sub-2mm text). At normal working scales it’s invisible.
Leather Engraving
Vegetable-tanned leather at 3mm — I ran the SF-A9 at 400mm/s, 35% power. Results were clean with a warm brown burn and good edge definition. The air assist at low pressure prevents scorch spread without blowing the material, which is the balance you want on leather.
I engrave a lot of custom leather goods in my shop and the SF-A9 produces sellable results. Not xTool S1-class (the S1’s enclosed beam path gives it a precision edge), but comfortably above budget open-frame machines I’ve tested in this range. For a full comparison of the SF-A9 against six machines specifically tested on leather, see our best laser engraver for leather guide — it includes settings for vegetable-tanned, chrome-tanned, and faux hides.
Anodized Aluminum
At 100mm/s, 70% power, the SF-A9 etched crisp, high-contrast marks on black anodized aluminum blanks. The 40W optical power helps here — higher wattage means you can move faster and still ablate the anodized coating cleanly, which reduces heat spread and keeps edge definition tight.
This is a category where the SF-A9’s power advantage over 20W machines is genuinely visible. Tags, dog tags, phone cases — all came out sharp. Color anodized aluminum (red, blue, gold) engraves equally well.
Cutting Performance
This is where the SF-A9 earns its place in the best laser engravers of 2026 guide.
| Material | Speed | Power | Passes | Air Assist | Result |
|---|---|---|---|---|---|
| 3mm basswood | 25mm/s | 100% | 1 | On | Clean cut, smooth edges |
| 6mm birch plywood | 10mm/s | 100% | 2 | On | Full cut, minor char on bottom face |
| 3mm black acrylic | 18mm/s | 85% | 2 | On | Clean cut, good edge clarity |
| 2mm craft foam | 80mm/s | 40% | 1 | Off | Clean cut, no melt |
| 3mm MDF | 15mm/s | 100% | 2 | On | Full cut, typical MDF char |
| 1.5mm leather | 30mm/s | 55% | 1 | Low | Clean cut, minimal scorch |
The 3mm basswood single-pass cut is the number that matters most to most buyers in this category. At 25mm/s and 100% power, the SF-A9 cuts cleanly in one pass — no second-pass cleanup needed. A 20W machine typically needs 2 passes or significantly slower speeds to achieve the same result.
The 6mm birch plywood result is honest: it cuts, but the bottom face shows minor char from 2 passes. That’s normal for diode lasers at this thickness — it’s not a flaw, it’s physics. Sand the bottom face or design around it. If you’re regularly cutting 6mm+ material, the SF-A9 handles it, but you should also be looking at enclosed diode machines like the xTool S1 or eventually a CO2 setup. My best CO2 laser engraver guide covers that next step if your cutting demands are heavy.
Air Assist Performance
Built-in air assist is one of the SF-A9’s clearest selling points. The integrated pump delivers consistent airflow across the laser module, and the pressure is adjustable — lower for engraving (reduces material blowout on delicate surfaces), higher for cutting (clears debris and suppresses flame).
I ran side-by-side cuts on 6mm birch with and without air assist. Without: 3 passes, inconsistent edge quality, visible charring on cut walls. With: 2 passes, cleaner walls, noticeably less smoke deposit. The difference isn’t subtle.
Some competing machines in this price range offer air assist as an add-on kit. The SF-A9 having it integrated — with the pump already wired, no external kit required — is a real convenience and a meaningful cost saving if air assist was already in your budget.
One caveat: the stock pump is adequate, not exceptional. Makers doing heavy production cutting sometimes upgrade to a higher-pressure external compressor. For most users the built-in pump is fine.
Software: Sculpfun Maker and LightBurn
I’ll be direct: Sculpfun Maker is the weakest part of this machine.
The proprietary software is functional — you can import designs, set parameters, and run jobs. But the UI is clunky compared to xTool’s Creative Space (XCS), the material library is limited, and I found parameter saving to be inconsistent across sessions. It works, but it doesn’t work well.
My recommendation: install LightBurn immediately. It’s $60 for a perpetual license (with one year of updates), the SF-A9 connects without issue, and you get a workflow that is objectively superior in every dimension — camera alignment, material profiles, advanced fill settings, and job history. LaserGRBL is the free alternative and it’s more capable than Sculpfun Maker if you’re patient with a steeper interface.
If you’ve already paid for LightBurn from a previous machine, the license covers the SF-A9. If you’re buying LightBurn for the first time, factor that $60 into your total budget.
Sculpfun SF-A9 40W vs xTool D1 Pro 20W
The comparison most buyers ask about. Here it is, without spin.
| Category | Sculpfun SF-A9 40W | xTool D1 Pro 20W |
|---|---|---|
| Optical Power | 40W | 20W |
| Work Area | 400 × 400mm | 430 × 390mm |
| Max Speed | 600mm/s | 400mm/s |
| Grayscale Tones (3mm basswood) | 158 | 166 |
| Air Assist | Included | Add-on kit |
| Assembly Time | ~55 min | ~38 min |
| 3mm Basswood Cut | 1 pass @ 25mm/s | 2 passes @ 20mm/s |
| 6mm Plywood Cut | 2 passes @ 10mm/s | 3 passes @ 8mm/s |
| Software Quality | Sculpfun Maker (weak) + LightBurn | xTool Creative Space (strong) + LightBurn |
| Safety Features | Flame detection | Flame detection + more sensors |
| Community / Ecosystem | Growing | Large, established |
| Price (base) | ~$350–$450 | ~$400–$500 |
| Best For | Cutting-focused buyers | Engraving-focused buyers |
The SF-A9’s 40W optical output is a genuine advantage over the D1 Pro 20W in any cutting task. Single-pass where the D1 Pro needs two, faster speeds, deeper cuts in thick material. If you primarily cut product blanks, plywood shapes, or thick leather, the SF-A9 wins.
The D1 Pro wins on engraving quality (166 vs 158 tones is real, not marginal), software (xTool Creative Space is significantly better than Sculpfun Maker), and ecosystem depth. The xTool community is larger, there are more preset material profiles floating around, and the support documentation is more complete.
If I had to put it plainly: buy the SF-A9 if cutting is 60%+ of what you’ll do. Buy the D1 Pro if engraving quality is your priority, or if you’re newer to diode lasers and want a smoother out-of-box experience.
One more machine worth knowing about in this price range: the Atomstack A24 Pro review covers a 24W quad-diode machine with air assist and a comparable work area — a direct competitor at a slightly lower price point for buyers who want the cutting power without paying Sculpfun’s premium. For open-frame buyers on a tighter budget stepping down from the SF-A9, the Ortur Laser Master 3 review covers the 10W entry-level option with a strong safety feature set.
Who Should Buy the Sculpfun SF-A9 40W
Small business owners cutting product blanks. If you’re making coasters, keychains, ornaments, or signs — and cutting volume is your bottleneck — the SF-A9’s 40W output and 400 × 400mm work area make it a production-ready choice. My best laser engraver for small business guide goes deeper on this use case. For the full business startup framework from first machine to first sale, see how to start a laser engraving business.
Upgraders from 10W or 20W machines. If you already know you want more power and the cut quality of your current machine is the limiting factor, the SF-A9 is a logical step up. For wood-specific settings and how the 40W class compares on species like birch, pine, and MDF, our best laser engraver for wood guide has benchmarks.
Makers who cut 6mm+ wood regularly. The SF-A9 manages 6mm birch in 2 passes. That’s meaningful compared to a 20W machine’s 3-pass effort. For a full overview of the laser engraver market across diode, CO2, and fiber, see our complete laser engraver buyer’s guide.
Buyers where air assist is already in the budget. If you were going to buy an air assist kit anyway, the SF-A9’s integrated system saves money and desk space.
Who Should Look Elsewhere
Photo engravers and portrait artists. The 8-tone gap between the SF-A9 (158) and D1 Pro (166) shows in fine photographic work. If engraving quality is the whole game, go with the D1 Pro.
Complete beginners. The SF-A9 isn’t hard to use, but Sculpfun Maker’s mediocrity means you’ll want LightBurn immediately — adding $60 to the cost and a learning curve on day one. A machine with better bundled software is a smoother first experience.
Indoor users without ventilation. Open-frame 40W lasers produce significant fumes and require either a quality fume extractor or window exhaust. If your workspace can’t support that, look at the xTool S1 or another enclosed machine.
Buyers who need bare metal engraving. No diode laser engraves bare metal without coating. If that’s your primary use case, you need a fiber laser or a CO2 with a metal-marking additive.
Final Verdict
| Category | Score |
|---|---|
| Engraving Quality | 7.5 / 10 |
| Cutting Performance | 9.0 / 10 |
| Build Quality | 8.5 / 10 |
| Software | 6.5 / 10 |
| Air Assist | 8.5 / 10 |
| Value for Money | 8.5 / 10 |
| Safety Features | 8.0 / 10 |
| Overall | 8.3 / 10 |
After three months with the Sculpfun SF-A9 40W, my take is straightforward. Sculpfun built a machine that competes where it says it competes — on raw power and cutting depth, it outperforms every 20W diode laser I’ve tested, including the xTool D1 Pro. The integrated air assist is a genuine value-add, not a checkbox feature. Build quality is solid.
The honest limitations are real too. Sculpfun Maker is software you’ll want to replace immediately. Engraving quality trails the D1 Pro’s more refined optical path. And at 40W in an open frame, you need to take ventilation seriously.
For cutting-focused buyers and small business owners running a real production workload, the SF-A9 is a strong choice at this price point. For engraving-first buyers, the D1 Pro remains my preference.
Frequently Asked Questions
Is the Sculpfun SF-A9 40W really 40 watts?
Can the Sculpfun SF-A9 40W cut acrylic?
Does the SF-A9 work with LightBurn?
How does the Sculpfun SF-A9 40W compare to the xTool D1 Pro 20W?
What materials can the Sculpfun SF-A9 40W engrave and cut?
Is the Sculpfun SF-A9 safe for home use?
How long does the SF-A9 take to assemble?
You Might Also Like
Sculpfun S9 Review 2026: The Budget Diode Laser That Punches Up
Sculpfun S9 review 2026: engraving quality, cutting limits, setup time, and how it stacks up against xTool and Ortur at the same price. Honest hands-on test.
xTool S1 40W Review 2026: Is the Extra Power Worth It?
xTool S1 40W review: real cutting benchmarks, engraving quality, and whether the 40W module is worth the upgrade over the 20W. Hands-on tested 2026.
Creality Falcon 2 Pro Review 2026: Is $1,899 Worth It?
We tested the Creality Falcon 2 Pro 60W hands-on. Full verdict: cut speed, engraving quality, software, and whether it justifies $1,899 vs the xTool P2 in 2026.