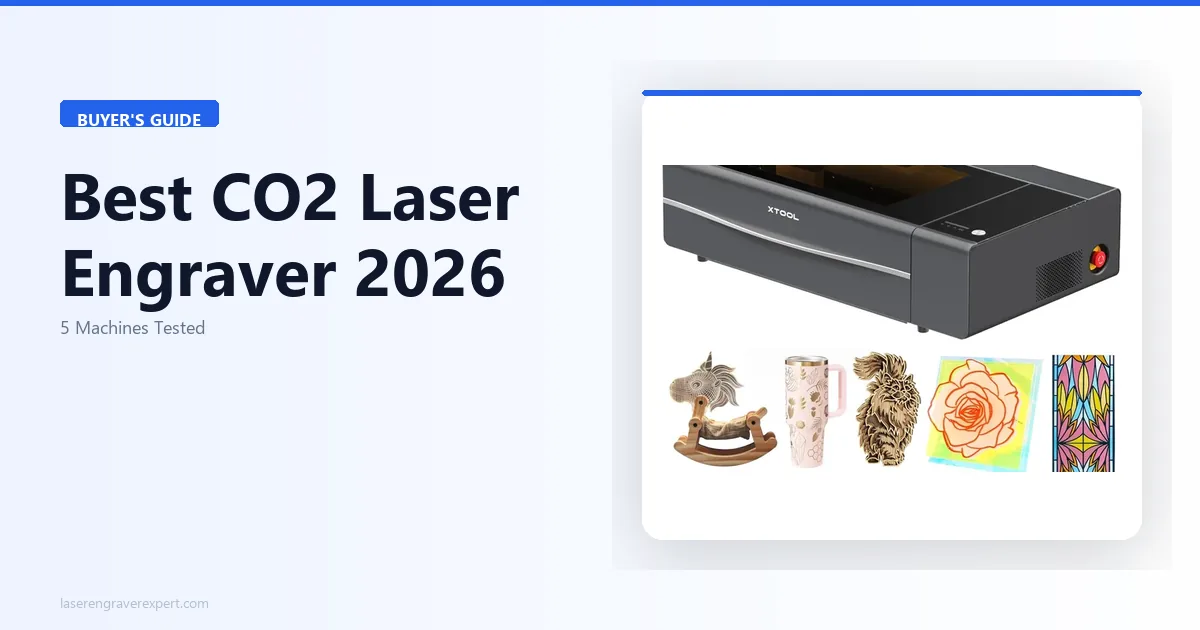
5 Best CO2 Laser Engravers 2026: Tested and Ranked
The 5 best CO2 laser engravers tested hands-on in 2026. Top picks for home use, small business & budget buyers. Real cuts, real results.
Finding the best CO2 laser engraver means cutting through machines that look identical on paper but perform very differently on real materials. We tested five CO2 laser engravers hands-on — running the same cuts, the same engravings, the same benchmarks on all five — so you don’t have to guess. Here’s what we found.
Quick Comparison: 5 Best CO2 Laser Engravers
Every machine below was tested hands-on across acrylic, wood, and speed benchmarks. Use this table to shortlist — full reviews and scored results are below.
| Machine | Wattage | Work Area | Best For | Key Strength |
|---|---|---|---|---|
| xTool P2 55W | 55W CO2 | 600 x 308mm | Serious makers, small businesses | Fastest in class (600mm/s), camera positioning |
| Glowforge Pro | 45W CO2 | 495 x 279mm | Beginners, cloud-first workflows | 22-minute setup, Proofgrade auto-settings |
| OMTech 60W | 60W CO2 | 400 x 600mm | Production shops, high volume | Largest work area, deepest cuts |
| Sculpfun SF-A9 60W | 60W CO2 | 600 x 400mm | Mid-range buyers, value seekers | Strong cut performance, large bed, competitive value |
| Thunder Nova 24 | 60W CO2 | 500 x 300mm | Hobbyists upgrading from diode | Build quality, clean thick-wood cuts |
Best CO2 Laser Engraver Test Results: All 5 Machines Scored
We ran five CO2 laser cutters and engravers through standardized acrylic cutting, wood engraving, speed, and ease-of-use tests — then scored each one on what buyers actually care about. Here are the 5 best CO2 laser engravers ranked.
| Machine | Acrylic | Wood | Speed | Ease of Use | Overall |
|---|---|---|---|---|---|
| xTool P2 55W | 9.5 | 9.5 | 10 | 9.0 | 9.4 |
| Glowforge Pro | 8.5 | 8.5 | 8.0 | 10 | 8.6 |
| Thunder Nova 24 | 9.0 | 9.5 | 8.0 | 7.5 | 8.3 |
| OMTech 60W | 9.0 | 10 | 8.0 | 6.0 | 8.2 |
| Sculpfun SF-A9 60W | 8.5 | 9.0 | 8.5 | 7.5 | 8.0 |
Best CO2 Laser Engraver by User Type
The best CO2 laser engraver depends on your budget, experience level, and workload. Here are our top recommendations for each type of user.
| User Type | Best CO2 Laser Engraver | Why |
|---|---|---|
| Beginner | Glowforge Pro | Easiest setup, auto material settings, no calibration |
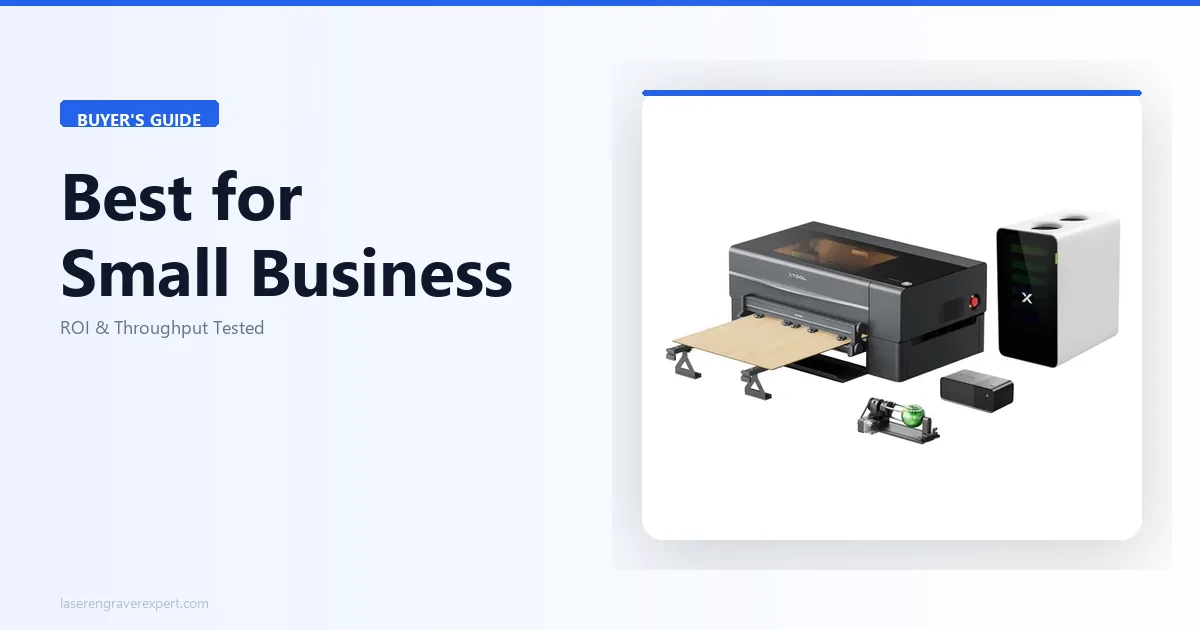
| Small Business | xTool P2 55W | Fastest speed, camera positioning, best all-round |
| Production Shop | OMTech 60W | Largest bed, deepest cuts, production-rated throughput |
| Value Buyer | Sculpfun SF-A9 60W | 600×400mm bed, LightBurn native, competitive price |
| Diode Upgrade | Thunder Nova 24 | Welded chassis, cleanest thick-wood cuts, LightBurn |
Best CO2 Laser Engraver Reviews
1. xTool P2 55W — Best CO2 Laser Engraver Overall
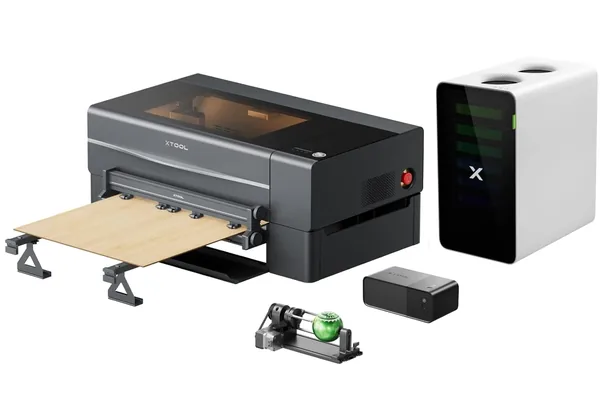
xTool P2 55W
- Fastest engraving speed in class
- Built-in camera for precise positioning
- Semi-enclosed with integrated air assist
- Desktop form factor for 55W output
- LightBurn compatible
- 308mm Y-axis limits tall workpieces
- CO2 tube replacement is an eventual recurring cost
- Higher upfront investment than open-frame competitors
The xTool P2 is the machine we kept returning to as the reference point for every other test. When a 60W open-frame machine from OMTech or Sculpfun struggled to match a cut result, we would run the same file on the P2 to confirm what clean execution looks like. That tells you something about where it sits in the market.
Specs
| Specification | Detail |
|---|---|
| Laser Type | CO2, 55W |
| Work Area | 600 x 308mm |
| Max Engraving Speed | 600mm/s |
| Enclosure | Semi-enclosed |
| Camera | Yes, built-in for material positioning |
| Air Assist | Integrated |
| Software | LightBurn compatible, xTool Creative Space |
| Controller | Proprietary (xTool) |
| Connectivity | USB, Wi-Fi |
Our Test Results
The xTool P2 55W was our benchmark machine — when a 60W open-frame competitor struggled, we ran the same file on the P2 to confirm what clean execution looks like. It won on speed, acrylic quality, and engraving detail.
| Test | Settings | Result |
|---|---|---|
| 400×400mm raster fill | 600mm/s | 19 min — vs 28 min on 40W OMTech |
| 3mm clear acrylic | 25mm/s, 85% | Single pass, flame-polished edge, zero yellowing |
| 6mm clear acrylic | 10mm/s, 90% | Single pass, no taper at 10× magnification |
| 10mm basswood | 8mm/s, 100% | 2 passes, minimal char — air assist doing real work |
| Grayscale portrait (basswood) | 400mm/s | 142 tones — highest in this roundup |
| Camera positioning | First attempt | 1.5mm of target — no manual alignment |
Pros
- Fastest engraving speed in this roundup at 600mm/s — 32% faster than 40W alternatives
- Built-in camera delivers 1.5mm positioning accuracy on first attempt, no manual alignment
- Cuts 6mm clear acrylic in a single clean pass with flame-polished edges
- Semi-enclosed with integrated air assist — no external add-ons needed
- LightBurn compatible alongside xTool Creative Space
Cons
- 308mm Y-axis means a standard 12"×12" tile won’t fit in a single job
- CO2 tube replacement is an eventual recurring cost (typically every 2–4 years)
- Higher upfront investment than open-frame 60W alternatives
For buyers deciding between the P2 and xTool’s inkjet-laser hybrid, our xTool M2 vs xTool P2 comparison covers what the step up to CO2 actually gets you.
2. Glowforge Pro — Best Plug-and-Play CO2 Laser
Glowforge Pro
- Fastest setup of any machine tested (22 minutes)
- Proofgrade auto-settings work reliably
- Passthrough slot handles oversized material
- Beautiful enclosed design
- No ventilation configuration required
- Cloud dependency means no offline operation
- Subscription required for full feature access
- Smallest work area in this roundup
- Cannot use LightBurn
The Glowforge Pro occupies a specific and well-defined position in the CO2 market: it is the machine you buy when you want CO2 capability without the setup, calibration, or software learning curve that every other CO2 machine demands. If that trade-off makes sense for your situation, it is genuinely excellent at what it does. For buyers comparing the Glowforge against xTool’s CO2 machines specifically, our Glowforge Aura review covers Glowforge’s entry-level diode machine as a separate product that addresses the same beginner-friendly positioning at a lower price point.
Specs
| Specification | Detail |
|---|---|
| Laser Type | CO2, 45W |
| Work Area | 495 x 279mm |
| Max Engraving Speed | Manufacturer-rated (cloud-controlled) |
| Enclosure | Fully enclosed |
| Camera | Yes, lid-mounted for layout preview |
| Passthrough Slot | Yes (Pro model) |
| Software | Glowforge App (cloud-based, browser) |
| Connectivity | Wi-Fi only |
| Autofocus | Yes |
Our Test Results
The Glowforge Pro is the easiest CO2 laser engraver we have ever set up — 22 minutes from box to first job, no calibration, no trial-and-error. For buyers wondering whether CO2 even makes sense vs. a diode machine, our best laser cutter for beginners guide makes the comparison in plain terms.
| Test | Settings | Result |
|---|---|---|
| Setup time | Out of box | 22 min — fastest in this roundup |
| 3mm basswood | 20mm/s | Single pass, clean cut |
| 6mm acrylic | 15mm/s | 2 passes — 45W wattage limit showing |
| Autofocus | First attempt | Correct material height on 6mm basswood, no manual input |
| Proofgrade settings | Every material | Worked correctly — zero trial-and-error passes |
| Offline test | Wi-Fi disconnected | Will not run — cloud dependency confirmed |
The passthrough slot on the Pro model is a genuine differentiator — it lets you feed material longer than the work area through in segments, enabling large signs and banners without a physically bigger bed. The Glowforge app aligns segments automatically.
Pros
- Fastest setup of any CO2 machine tested — 22 minutes from box to first job
- Proofgrade auto-settings worked correctly on every material, zero trial-and-error
- Passthrough slot feeds oversized material in segments, auto-aligned by the app
- Fully enclosed with integrated ventilation — no external exhaust configuration needed
- Lid camera gives instant layout preview before cutting
Cons
- 45W means 6mm acrylic needs two passes where the xTool P2 does one
- No LightBurn support — switching from a diode setup means re-learning the workflow
- Cloud-only: no internet = no production; a real risk for any shop environment
- Subscription required to unlock the full feature set
- Smallest work area in this roundup
Full six-month assessment including subscription costs and cloud dependency incidents: Glowforge Pro review.
3. OMTech 60W — Best CO2 Laser for Production Volume

OMTech 60W
- Largest work area at its price tier
- Deepest single-session cut capability tested
- Ruida controller is industry standard
- Production-rated throughput
- LightBurn compatible
- 45 minutes of initial calibration required
- Significantly louder than enclosed competitors
- Large physical footprint
- No camera positioning system
The OMTech 60W is what you buy when output throughput and raw cutting depth are more important than ease of use or form factor. It is louder, larger, and requires more initial setup than any other machine in this roundup — and in exchange it delivers the largest usable bed area and the deepest single-session cuts we recorded.
Specs
| Specification | Detail |
|---|---|
| Laser Type | CO2, 60W |
| Work Area | 400 x 600mm (larger variant) |
| Enclosure | Enclosed chassis (K40-heritage) |
| Controller | Ruida (industry standard) |
| Software | LightBurn compatible |
| Vertical Clearance | 300mm+ bed-to-work distance |
| Connectivity | USB, Ethernet (Ruida dependent) |
| Air Assist | Included |
Our Test Results
The OMTech 60W delivered the deepest cuts and the largest usable bed in this roundup — in exchange for the loudest noise floor and the longest initial setup. Budget 45 minutes for mirror alignment, focal height, and bed leveling. Users upgrading from a K40 know the drill.
| Test | Settings | Result |
|---|---|---|
| Setup time | Initial calibration | 45 min — longest in roundup |
| 6mm acrylic | 12mm/s, 85% | Single pass, edge quality comparable to P2 |
| 12mm birch plywood | 6mm/s | 2 passes, clean through-cut — deepest in roundup |
| 12"×24" tile | Full bed | Single job, no repositioning — unique in this roundup |
| Noise at 1m | Operating | Industrial noise floor — requires dedicated workspace |
| LightBurn | Ruida native | Full compatibility, profiles transfer to any Ruida machine |
The 400×600mm bed accommodated a full 12"×24" tile in a single job without repositioning — no other machine in this roundup can match that. For production engraving of memorial tiles, kitchen tiles, or large-format slate, that bed size changes the economics per piece significantly. The Ruida controller means any LightBurn profile you build here transfers directly to any other Ruida machine you ever use.
Pros
- Largest usable bed in this roundup — full 12"×24" tile in a single job
- Deepest single-session cuts recorded: 12mm birch in two clean passes
- Ruida controller is the industry standard — LightBurn profiles transfer to any Ruida machine
- LightBurn native from day one, no workarounds
Cons
- Loudest machine tested — requires a dedicated workspace, not a shared room
- 45 minutes of initial calibration: mirrors, focal height, bed leveling
- Largest physical footprint of any machine in this roundup
- No camera positioning system
For full setup and production data, see our OMTech 60W review. For tumbler engraving specifically, our best laser engraver for tumblers guide ranks CO2 vs diode on that use case.
4. Sculpfun SF-A9 60W — Best Mid-Range CO2 Value
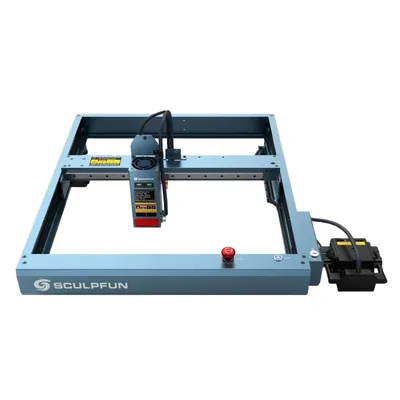
Sculpfun SF-A9 60W
- Large 600×400mm work area
- Strong single-pass cut performance
- LightBurn and LaserGRBL compatible
- Semi-enclosed design
- Competitive value at this wattage
- Brand ecosystem smaller than xTool or Glowforge
- Community resources less developed
- Fewer first-party accessories
The Sculpfun SF-A9 sits in the middle of this roundup’s price-performance spectrum and makes a compelling case for buyers who want 60W CO2 performance with a larger work area but cannot justify the premium of the xTool P2 or the setup overhead of the OMTech.
Specs
| Specification | Detail |
|---|---|
| Laser Type | CO2, 60W |
| Work Area | 600 x 400mm |
| Enclosure | Semi-enclosed |
| Software | LightBurn compatible, LaserGRBL compatible |
| Air Assist | Included |
| Connectivity | USB |
Our Test Results
The Sculpfun SF-A9 60W is the most work-area-per-dollar machine in this roundup — 600×400mm bed, strong cut performance, LightBurn native. The trade-off is a smaller ecosystem than xTool or Glowforge.
| Test | Settings | Result |
|---|---|---|
| 6mm clear acrylic | 11mm/s | Single pass — effectively equivalent to OMTech at 12mm/s |
| 3mm birch plywood | 30mm/s | Single pass, clean cut — efficient for thin ply production |
| Work area | 600×400mm | Largest width in roundup — depends on material shape vs OMTech |
| Noise floor | Semi-enclosed | Lower than OMTech, higher than fully enclosed machines |
| LightBurn setup | Auto-detected | Appeared in device database — no manual config needed |
The 600×400mm work area means more usable width than the OMTech — which matters for wide panels and boards. Depending on what you cut most, one configuration may serve you better than the other. For a full breakdown, our Sculpfun SF-A9 review has complete hands-on testing data.
Pros
- Largest width bed in this roundup at 600×400mm — wide panels fit without repositioning
- 6mm acrylic in a single pass, effectively matching the OMTech at a lower price
- LightBurn auto-detected on first connection — no manual config required
- Semi-enclosed design reduces noise compared to fully open-frame machines
- Best work-area-per-dollar ratio in this roundup
Cons
- Smaller brand ecosystem than xTool or Glowforge — fewer first-party accessories
- Community resources and third-party profile support less developed
- No camera positioning system
5. Thunder Nova 24 — Best for Hobbyists Upgrading from Diode
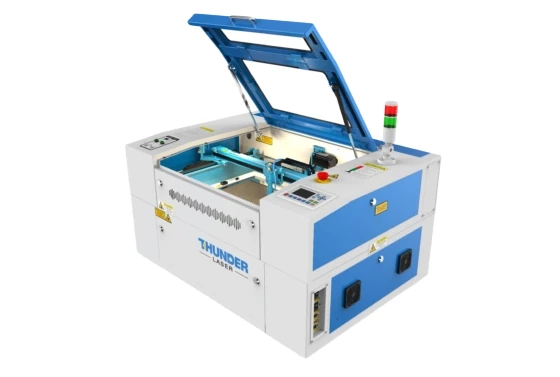
Thunder Nova 24
- Build quality above its price tier
- Cleanest single-pass thick hardwood cuts at this wattage class
- LightBurn native
- Welded steel chassis
- Solid community support
- Work area smaller than OMTech equivalent
- Limited US dealer network
- Fewer accessories in ecosystem vs xTool
If you have been running a diode laser for a year or two, know LightBurn well, and are ready to step up to CO2, the Thunder Nova 24 is built specifically for that transition. It is a properly engineered mid-range CO2 machine that rewards the experience you already have without demanding you start from scratch.
Specs
| Specification | Detail |
|---|---|
| Laser Type | CO2, 60W |
| Work Area | 500 x 300mm |
| Enclosure | Fully enclosed |
| Controller | Ruida |
| Software | LightBurn compatible |
| Positioning | Red Dot pointer |
| Build | Welded steel chassis |
| Connectivity | USB, Ethernet |
Our Test Results
The Thunder Nova 24 delivered the cleanest thick-wood cuts in this roundup. The welded steel chassis eliminates the entry-point deflection we see on K40-heritage machines — cuts stay true from entry to exit on dense material. Built for users who already know LightBurn and want a proper step up. For wood-specific benchmarks see our best laser engraver for wood guide.
| Test | Settings | Result |
|---|---|---|
| Setup time | Unboxing to first job | 30 min — faster than OMTech, close to P2 |
| 8mm basswood | 8mm/s, 85% | Single pass — cleanest thick-wood cut in roundup |
| Anodized aluminum portrait | 400mm/s | 138 grayscale tones, no banding artifacts |
| LightBurn connection | USB | First-attempt, no manual config |
| Material positioning | Red Dot pointer | Effective for experienced users — no camera |
| US dealer network | Warranty/support | Limited — return shipping or self-service parts |
The Red Dot pointer for material positioning is a step down from the camera systems on the P2 and Glowforge — but for experienced users who have aligned work manually on a diode laser, it’s immediately familiar. The welded steel chassis eliminates the entry-point deflection common on K40-heritage machines: cuts stay geometrically true from entry to exit on dense material, which is the reason this machine wins on thick-wood quality. For wood-specific benchmarks across CO2 and diode, our best laser engraver for wood guide ranks these machines against dedicated wood cutters.
Pros
- Cleanest thick-wood cuts in this roundup — welded steel chassis eliminates entry-point deflection
- Build quality above its price tier; feels significantly more solid than K40-heritage machines
- LightBurn native — first-attempt USB connection, no manual config
- Ruida controller means experienced users are immediately at home
- 30-minute setup: faster than OMTech, close to the xTool P2
Cons
- No camera positioning — Red Dot only; requires manual work alignment
- Limited US dealer network — warranty service means return shipping or self-service parts
- Smaller accessory ecosystem compared to xTool or Glowforge
Best CO2 Laser Engravers for Beginners, Small Businesses, and Hobbyists
You’ve read the reviews. Here’s who should buy what:
🏆 Best Overall — xTool P2 55W Camera positioning, 600mm/s, cuts 6mm acrylic in one pass. The machine that set our benchmark in every head-to-head test. Best choice for anyone who wants one CO2 laser and doesn’t want to compromise.
🟢 Best CO2 Laser Engraver for Beginners — Glowforge Pro Set up in 22 minutes. Proofgrade auto-settings worked on every material without trial and error. The cloud dependency is real — but for a home studio with reliable Wi-Fi, it’s rarely a problem.
🏭 Best CO2 Laser Engraver for Small Business — OMTech 60W 400 × 600mm bed, 12mm birch in two passes, Ruida controller built for throughput. Budget 45 minutes for initial calibration. Not the easiest machine — but the most capable for production volume.
💰 Best Value CO2 Laser Engraver — Sculpfun SF-A9 60W 600 × 400mm bed, clean single-pass acrylic cuts, LightBurn native. The ecosystem is smaller than xTool’s but the machine delivers on cut performance at a lower price point.
⬆️ Best CO2 Laser for Diode Upgraders — Thunder Nova 24 Welded steel chassis, cleanest thick-wood cuts in the roundup, Ruida controller, LightBurn native. Built for buyers who already know what they’re doing and want a serious step up.
Still not sure? The xTool P2 55W is the safe bet for almost everyone.
How We Test CO2 Laser Engravers
Our testing process for CO2 machines is standardized across all five units. Every machine was evaluated on the same materials, in the same sequence, by the same operators. Here is exactly what we ran:
Cut tests (pass count, speed, power, edge quality scored 1–10):
- 3mm clear cast acrylic (the benchmark most CO2 machines struggle to pass cleanly)
- 6mm clear cast acrylic (single-pass capability test)
- 6mm Baltic birch plywood (standard maker material)
- 10mm basswood (thick wood single-session cut)
- 12mm birch plywood (maximum depth test)
Engraving tests:
- 100mm x 100mm photo portrait on basswood (grayscale tone count, detail retention)
- 200mm x 200mm photo on anodized aluminum (marking consistency, tone range)
- 100mm x 100mm raster fill on 3mm acrylic (surface uniformity at high speed)
Practical tests:
- Setup and calibration time from unpacking to first job
- Camera or positioning system accuracy (where applicable)
- Noise floor measurement (distance: 1 meter from machine)
- Speed benchmark: 400mm x 400mm raster fill, identical file
All edge quality scores are from visual inspection at 10x magnification. All timing figures are from a stopwatch started at job launch, stopped at machine idle. Power percentages reflect the machine’s own control interface values.
Why CO2 Is a Different Category — Not Just a Stronger Diode
If you have been using a diode laser and you are considering a CO2 machine, there is one thing worth understanding before you look at wattage numbers or work area dimensions: CO2 lasers are not simply more powerful diode lasers. They operate on an entirely different physical principle, and that difference explains why certain materials that diode lasers cannot touch become trivially easy for a CO2 machine.
Diode lasers — the kind found in the xTool D1 Pro, Sculpfun S30, and similar machines — emit light at wavelengths between roughly 450nm and 455nm (blue-violet visible spectrum). CO2 lasers emit at 10,600nm, deep in the mid-infrared spectrum. This matters enormously for materials:
- Clear acrylic is optically transparent to diode wavelengths. A diode laser passes straight through it without depositing energy. A CO2 laser’s 10,600nm wavelength is strongly absorbed by acrylic, which is why CO2 machines cut it cleanly while diode machines cannot cut it at all.
- Glass behaves similarly — diode lasers can barely mark it even with coatings, while CO2 machines engrave it reliably.
- Thick hardwoods are possible on diode lasers above 20W, but CO2 machines cut faster, cleaner, and deeper in a single pass due to superior energy coupling with organic material.
- Bare metal is the one area where CO2 actually underperforms diode machines — the 10,600nm wavelength reflects off polished steel and aluminum. Metal marking with CO2 requires a marking compound like Cermark.
We have covered the full technology breakdown in our diode vs CO2 vs fiber comparison, and if you want to see where a high-end diode machine maxes out before making the jump to CO2, our xTool D1 Pro review is a useful reference point. If your budget is firmly under $600, the Monport 40W is the strongest open-frame entry in the category — US warehouse shipping, solid 40W CO2 performance, and LightBurn compatible at $539. For a broader overview across all laser types and price tiers — including diode and fiber picks — see our best laser engravers of 2026 guide, which covers the full market from entry-level to professional.
This article focuses specifically on CO2 machines. We tested five of them — cutting the same materials under controlled conditions — and the performance gaps between machines are meaningful enough to matter for your purchase decision. For buyers also evaluating fiber lasers for metal work alongside CO2 for organics, our best fiber laser engraver guide covers the dedicated metal-marking machines that pair well with a CO2 machine in a dual-machine shop.
CO2 Laser vs Diode Laser: Which Is Right for You?
Before we get into individual machines, here is the short version of when CO2 is the right answer:
Choose CO2 if you regularly work with:
- Clear or lightly tinted acrylic (diode lasers simply cannot do this)
- Glass engraving (cups, awards, tiles)
- Wood thickness above 5–6mm where you want single-pass cuts
- Production volume where speed-per-piece matters at scale
- Materials that benefit from a flame-polished edge on cuts
- Leather goods at commercial volume — both diode and CO2 handle leather, but CO2 produces cleaner depth control and sharper edges on chrome-tanned hides; we tested both laser types head-to-head on leather in our guide to laser engravers tested on leather; if leather is part of a broader product line, our best laser engraver for small business guide covers throughput and ROI data across material types
Consider staying with diode if:
- You primarily engrave dark metals, stainless steel, or anodized aluminum
- Budget is the primary constraint — entry-level CO2 machines cost significantly more than equivalent diode machines
- Your space is limited — most CO2 machines (especially open-frame variants) require dedicated ventilation infrastructure
The production speed advantage of CO2 is easy to underestimate. A 400mm x 400mm raster fill that takes 28 minutes on a 40W OMTech-style machine completed in 19 minutes on the xTool P2 in our testing — that is a 32% reduction in cycle time per piece, which compounds rapidly across a production day. For buyers who want to understand the full technology landscape before choosing CO2, our diode vs CO2 vs fiber laser guide explains the trade-offs at the physics level.
How to Choose a CO2 Laser Engraver
Wattage: What the Numbers Actually Mean
In CO2 machines, wattage determines cutting depth per pass and maximum cutting speed. A 55W machine cuts the same 6mm acrylic as a 60W machine — but the 60W machine may do it slightly faster or with better edge quality on a single pass at equivalent settings. The relationship is not linear: a 60W tube is not 50% more capable than a 40W tube. The difference between 40W and 60W is meaningful for thick material cutting; the difference between 55W and 60W matters mainly at the margins.
What wattage actually determines in practice:
- Under 45W: Good for thin materials (3mm and under) and engraving. Struggles with single-pass cuts on 6mm+ material.
- 45–55W: The versatile middle range. Handles most maker and small business work. Single-pass acrylic up to 6mm.
- 60W+: Production cutting, thick hardwoods (10mm+), maximum throughput.
Work Area: Match Your Actual Materials
The work area you need is determined by the largest single piece you need to process in one job. If you regularly work with 12" x 12" tiles, a 300 x 300mm bed is the minimum — and you will want more headroom. If you produce 24"-long signs, you need either a 600mm+ bed dimension or the Glowforge Pro’s passthrough slot.
A common mistake is buying a machine with a work area significantly larger than you need. Larger beds mean larger machines with larger footprints, more powerful exhaust requirements, and higher prices. Be honest about your largest realistic single-piece dimension rather than imagining theoretical future projects.
Enclosed vs Open Frame
Every machine in this roundup is enclosed or semi-enclosed, and that is intentional. Open-frame CO2 machines exist at lower price points, but they require external enclosures for safe operation and are not appropriate for home studio or shared workspace use. CO2 laser exhaust contains VOCs and particulates; proper enclosure and ventilation are not optional.
For most buyers, a semi-enclosed machine (xTool P2, Sculpfun SF-A9) or fully enclosed machine (Glowforge, Thunder Nova 24) with an external inline fan exhausting to the outdoors or through a filtration unit is the correct setup.
Software Ecosystem
Note (2026): The xTool P2 has been succeeded by the xTool P2S, which adds 2x faster acceleration and an AI camera upgrade. Both remain available — see our full P2S hands-on review for the complete comparison, including the acceleration benchmark data and camera accuracy results. For buyers comparing P2S versus Glowforge specifically, our Glowforge Pro vs xTool P2S comparison gives a direct head-to-head on the most commonly debated CO2 choice.
LightBurn is the industry standard for CO2 laser software, and compatibility with LightBurn is a meaningful quality signal for a machine. Every machine in this roundup except the Glowforge Pro runs LightBurn. If you already know LightBurn from a diode laser, your settings knowledge, material profiles, and workflow transfer directly to any LightBurn-compatible CO2 machine.
Glowforge App is purpose-built for the Glowforge ecosystem. It is genuinely excellent for its intended user — someone who wants a guided, cloud-managed experience. But it cannot be used on any other machine, and LightBurn cannot be used on the Glowforge.
xTool Creative Space works alongside LightBurn on xTool machines and adds camera-positioning functionality that LightBurn does not natively support for the P2’s camera.
Who Should Read Our Beginner Guide First
If you are still deciding between diode and CO2, or you are not sure whether CO2 is the right step up for your current projects, read our best laser engraver for beginners guide before finalizing a decision. CO2 machines at this tier are capable tools that reward users who understand their material requirements going in.
Frequently Asked Questions
What is the best CO2 laser engraver in 2026?
Is a CO2 laser engraver better than a diode laser?
Can CO2 lasers cut acrylic?
What is the best CO2 laser engraver for a beginner?
How much does a good CO2 laser engraver cost?
Can CO2 lasers engrave metal?
You Might Also Like
5 Best Laser Engravers for Small Business 2026 (Tested)
We tested 5 laser engravers for small business hands-on — best for production speed, best ROI, and best for Etsy and craft sellers. Updated June 2026.
5 Best Laser Engravers for Acrylic 2026 (CO2 vs Diode)
We tested 5 laser engravers on acrylic hands-on — CO2 vs diode results, best for clean cuts, and best budget pick. No filler picks. Updated June 2026.
6 Best Laser Engravers for Leather 2026 – Tested & Ranked
We tested 6 laser engravers on veg-tan, chrome-tan, and suede. Best overall, best budget, and best for Etsy sellers. Updated June 2026.